
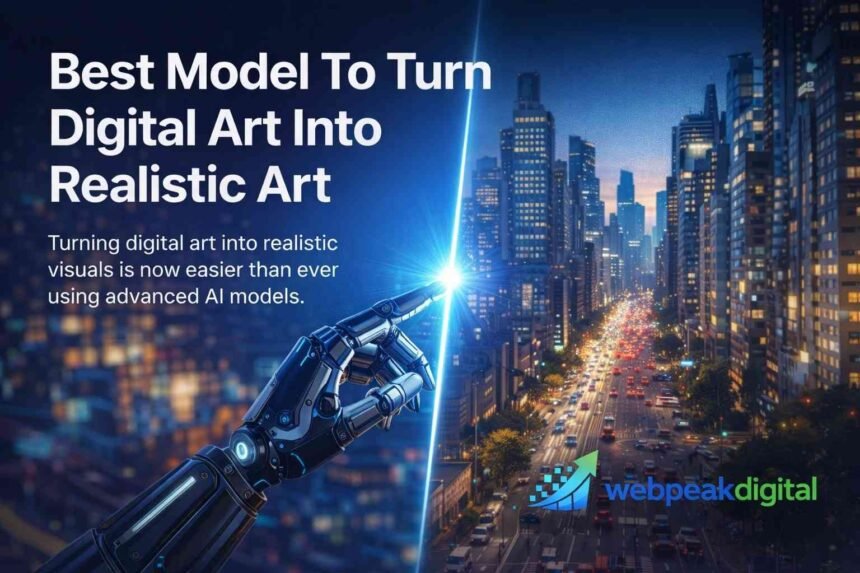
Turning digital artwork into something that looks convincingly real is no longer about trial and error it depends on choosing the right tools and models. For users working with Invoke AI, the question often comes down to finding the invoke ai best model to turn digital art into reallistic without losing the original composition or intent. This is not a single-click decision. Model architecture, image-to-image settings, and workflow discipline all play a role in whether the result feels photographic or artificial.
Invoke AI offers flexibility, but that flexibility also creates confusion. Different models behave differently when asked to reinterpret drawings, paintings, or concept art into realistic outputs. Some models prioritize visual polish, others focus on structural accuracy, and a few are designed to balance both. Understanding how these models work—and when to use them—is essential for anyone aiming to produce reliable, realistic results rather than inconsistent experiments.
This guide breaks down how realism is actually achieved inside Invoke AI, what makes a model suitable for digital-to-realistic conversion, and how professionals approach the process to avoid common failures.
What Does “Turning Digital Art Into Realistic Images” Mean in Invoke AI?
Turning digital art into realistic images in Invoke AI means using image-to-image generation to reinterpret an existing artwork with real-world textures, lighting, and physical detail while keeping its core structure.
Difference Between Stylized Art and Photorealism
Stylized art prioritizes artistic exaggeration, while photorealism aims to replicate how real photos look.
-
Stylized art uses simplified shapes, flat shading, or painterly effects
-
Photorealism focuses on skin texture, material response, depth, and light falloff
-
Invoke AI shifts outputs toward realism by applying learned photographic patterns
What Invoke AI Actually Changes During Image Transformation
Invoke AI does not “enhance” an image like a filter; it regenerates pixels based on learned data.
-
Reinterprets color gradients into real-world lighting
-
Converts drawn textures into photographic surface detail
-
Adjusts proportions subtly to match realistic anatomy or perspective
When “Realistic” Is a Technical vs Visual Goal
Realism can mean technical accuracy or visual believability, and these are not always the same.
-
Technical realism focuses on anatomy, optics, and scale
-
Visual realism focuses on what looks believable to viewers
-
Most workflows balance both, depending on the use case
How Invoke AI Processes Digital Art Into Realistic Outputs
Invoke AI processes digital art into realistic outputs through an image-to-image diffusion workflow guided by model choice and generation settings.
Image-to-Image (img2img) Workflow Explained
Image-to-image generation uses the original artwork as a structural reference.
-
The source image defines composition and layout
-
The model regenerates detail based on noise and prompts
-
Lower noise preserves structure; higher noise increases transformation
Role of Denoising Strength and Sampling
Denoising strength controls how much the original art is altered.
-
Low denoise keeps shapes and poses intact
-
Medium denoise allows realistic texture and lighting
-
High denoise reimagines the image almost entirely
How Prompts Influence Realism in Invoke AI
Prompts guide how the model interprets realism, not just what it generates.
-
Realistic prompts include lighting, camera, and material cues
-
Vague prompts produce inconsistent realism
-
Overly stylized terms reduce photorealistic outcomes
Understanding Invoke AI Model Types and Capabilities
Invoke AI supports multiple model categories, each suited to different realism goals.
Rendering Models vs Interpretive Models
Rendering models aim for polished realism, while interpretive models focus on transformation logic.
-
Rendering models excel at photorealistic output
-
Interpretive models better follow the source image’s intent
-
The best results often come from combining both approaches
SD 1.5 vs SDXL vs Newer Architectures
Model architecture directly affects realism quality and consistency.
-
SD 1.5 models are faster and widely supported
-
SDXL models offer higher detail and better lighting logic
-
Newer architectures improve reference handling and fidelity
Model Compatibility Inside Invoke AI
Not all models behave the same inside Invoke AI.
-
Checkpoint and diffusers formats are commonly supported
-
Some models require more VRAM or tuning
-
Compatibility impacts stability and output quality
What Makes a Model “Best” for Realistic Art Conversion
The best model for realistic art conversion balances fidelity, control, and consistency.
Texture, Lighting, and Anatomy Accuracy
Realism depends on how well a model understands physical detail.
-
Skin pores, fabric weave, and surface roughness matter
-
Lighting direction must match real-world physics
-
Anatomy errors quickly break realism
Preservation of Original Composition
A strong realism model respects the original artwork’s structure.
-
Maintains pose, framing, and perspective
-
Avoids unwanted cropping or distortion
-
Works predictably at lower denoise levels
Style Transfer vs Full Transformation
Different tasks require different transformation depth.
-
Style transfer enhances realism while keeping the original look
-
Full transformation creates a new photorealistic version
-
Model choice determines how far the change goes
Best Invoke AI Models for Turning Digital Art Into Realistic Images
There is no single best model, but several models consistently perform well for realistic conversion tasks.
Top Models for Photorealistic Human Subjects
These models prioritize facial structure, skin texture, and lighting.
-
Models tuned for portraits and photography
-
Strong handling of eyes, hands, and expressions
-
Consistent results at medium denoise levels
Best Models for Realistic Environments and Objects
Environment-focused models handle scale, materials, and depth better.
-
Accurate surface reflections and shadows
-
Better realism in architecture and landscapes
-
Strong performance with wide compositions
Lightweight Models for Limited Hardware
Some models are optimized for lower-end systems.
-
Reduced VRAM usage
-
Faster generation times
-
Acceptable realism with careful prompting
How to Choose the Right Model Based on Your Use Case
The right model depends on the type of art and the final output goal.
Illustrations, Paintings, and Concept Art
Concept art often benefits from controlled realism.
-
Medium denoise preserves intent
-
Interpretive models reduce composition loss
-
Rendering models finalize realism
Character Art vs Background Art
Characters and environments have different realism needs.
-
Characters require anatomy and skin accuracy
-
Backgrounds rely on lighting and scale
-
Mixing models across passes often works best
Professional vs Hobbyist Requirements
Usage context affects model choice.
-
Professionals prioritize consistency and control
-
Hobbyists may prefer speed and ease
-
Licensing and output predictability matter for commercial use
Model Settings That Impact Realism the Most
Settings matter as much as model choice when aiming for realism.
Denoising Strength Ranges for Realism
Denoising strength determines transformation depth.
-
0.2–0.4 preserves most original detail
-
0.4–0.6 balances realism and structure
-
Above 0.6 risks losing the original design
Guidance Scale and Sampler Selection
These settings control how strictly the model follows the prompt.
-
Moderate guidance improves realism
-
Excessive guidance causes artifacts
-
Sampler choice affects texture smoothness
Resolution and Aspect Ratio Considerations
Resolution influences perceived realism.
-
Higher resolution improves detail clarity
-
Extreme aspect ratios may distort outputs
-
Start close to the source image size
Best Practices for Converting Digital Art Without Losing Quality
Quality loss is preventable with disciplined workflows.
Preparing Your Source Image
Clean input images produce better results.
-
Remove compression artifacts
-
Ensure proper contrast and clarity
-
Avoid extreme color grading before generation
Prompt Engineering for Realistic Results
Effective prompts describe how something looks, not just what it is.
-
Include lighting type and camera perspective
-
Describe materials and surface properties
-
Avoid conflicting style terms
Iterative Refinement Using Multiple Passes
Realism improves through controlled iteration.
-
First pass establishes realism
-
Second pass refines details
-
Final pass corrects problem areas
Common Mistakes When Trying to Achieve Realism in Invoke AI
Most realism failures come from workflow errors, not model limitations.
Over-Denoising and Image Drift
Excessive denoising removes the original structure.
-
Causes pose and proportion changes
-
Introduces random artifacts
-
Makes results inconsistent
Using the Wrong Model for the Task
Not all models handle every subject well.
-
Portrait models struggle with architecture
-
Environment models may distort faces
-
Model-task mismatch wastes time
Ignoring Lighting and Camera Cues
Realism depends heavily on photographic logic.
-
Flat lighting looks artificial
-
Missing camera cues reduce depth
-
Inconsistent shadows break immersion
Tools and Features in Invoke AI That Improve Realistic Results
Invoke AI includes tools that significantly improve realism when used correctly.
Inpainting and Out painting for Detail Control
Selective regeneration fixes problem areas.
-
Correct hands, faces, or textures
-
Preserve good areas while refining others
-
Improve realism without full reruns
Reference Images and Conditioning
Reference images guide realism more reliably than text alone.
-
Helps match lighting and mood
-
Preserves character identity
-
Reduces random variation
Upscaling and Post-Processing Tools
Final polish matters for realism.
-
Upscaling adds perceived detail
-
Minor sharpening improves clarity
-
Avoid aggressive post-processing
Performance and Hardware Considerations
Hardware limits directly affect realism workflows.
GPU VRAM Requirements by Model Type
Different models have different memory needs.
-
SD 1.5 models require less VRAM
-
SDXL models need significantly more
-
High-resolution workflows increase usage
Speed vs Quality Trade-Offs
Higher realism often means slower generation.
-
More steps improve detail
-
Larger images increase render time
-
Balance output needs with system limits
Optimizing Invoke AI for Realistic Workflows
Optimization improves stability and output quality.
-
Close unnecessary background tasks
-
Use batch sizes conservatively
-
Save intermediate results
Comparing Invoke AI to Other Tools for Realistic Art Conversion
Invoke AI is one of several tools capable of realistic image transformation.
Invoke AI vs Automatic1111
Invoke AI focuses on structured workflows.
-
More guided interface
-
Stronger node-based control
-
Better suited for repeatable processes
Invoke AI vs ComfyUI
ComfyUI offers deeper customization.
-
Higher learning curve
-
More granular control
-
Invoke AI is easier to standardize
When Invoke AI Is the Better Choice
Invoke AI works best when consistency matters.
-
Repeatable professional workflows
-
Team-based usage
-
Controlled realism pipelines
Frequently Asked Questions
Can Invoke AI really turn digital art into realistic images?
Yes, Invoke AI can convert digital art into realistic-looking images when image-to-image workflows, suitable models, and proper settings are used together. The quality depends on the source artwork, denoising strength, and how well the model understands real-world lighting and textures.
What is the Invoke AI best model to turn digital art into realistic images?
There is no single universal answer, but the Invoke AI best model to turn digital art into realistic results is usually a rendering-focused Stable Diffusion or SDXL model that handles photorealistic lighting, anatomy, and surface detail while still respecting the original composition.
Do I need advanced skills to get realistic results in Invoke AI?
No advanced technical background is required, but basic understanding of model selection, denoising control, and prompting significantly improves results. Most users improve quickly through iteration rather than complex setup.
Why do some results look realistic but still feel “off”?
This usually happens when lighting direction, camera perspective, or anatomy cues are missing or inconsistent. Even high-quality models produce unrealistic results if these details are ignored.
Is realism better achieved through prompts or model choice?
Model choice sets the ceiling for realism, while prompts and settings fine-tune the outcome. A strong model with poor prompts still underperforms, and good prompts cannot fully fix a weak realism model.
Can realistic outputs be used professionally?
They can, as long as the model’s license allows commercial use and the workflow produces consistent, repeatable results. Professionals typically validate models and settings before relying on them in production.